一、初识boot
可以从Spring或者idea上面直接创建boot项目
@RestController//返回字符串
1
2
3
4
5
6
7
8
9
10
@RestController public class hellocontroller @RequestMapping("/hello") public String hello () return "hello,world" ;
在application中启动程序
1. pom xml分析
1
2
3
4
5
6
7
8
9
10
11
12
13
14
15
16
17
18
19
20
21
22
23
24
25
26
27
28
29
30
31
32
33
34
35
36
37
38
39
40
41
42
43
44
45
46
47
48
49
50
51
52
53
54
55
<?xml version="1.0" encoding="UTF-8"?> <project xmlns ="http://maven.apache.org/POM/4.0.0" xmlns:xsi ="http://www.w3.org/2001/XMLSchema-instance" xsi:schemaLocation ="http://maven.apache.org/POM/4.0.0 https://maven.apache.org/xsd/maven-4.0.0.xsd" > <modelVersion > 4.0.0</modelVersion > <parent > <groupId > org.springframework.boot</groupId > <artifactId > spring-boot-starter-parent</artifactId > <version > 2.5.5</version > <relativePath /> </parent > <groupId > com.example</groupId > <artifactId > helloworld</artifactId > <version > 0.0.1-SNAPSHOT</version > <name > helloworld</name > <description > helloworld</description > <properties > <java.version > 1.8</java.version > </properties > <dependencies > <dependency > <groupId > org.springframework.boot</groupId > <artifactId > spring-boot-starter</artifactId > </dependency > <dependency > <groupId > org.springframework.boot</groupId > <artifactId > spring-boot-starter-test</artifactId > <scope > test</scope > </dependency > <dependency > <groupId > org.springframework.boot</groupId > <artifactId > spring-boot-starter-web</artifactId > </dependency > </dependencies > <build > <plugins > <plugin > <groupId > org.springframework.boot</groupId > <artifactId > spring-boot-maven-plugin</artifactId > </plugin > </plugins > </build > </project >
2. 配置端口
1 server.port = 8081 // properties配置端口文件
3. 启动器
1 2 3 4 <dependency > <groupId > org.springframework.boot</groupId > <artifactId > spring-boot-starter</artifactId > </dependency >
启动器:就是boot的启动场景
比如spring-boot-starter-web,他就会帮我们自动导入web环境的所有依赖
springboot会将所有的场景功能,都变成一个个的启动器
我们要使用什么功能,就只要找到对应的启动器就行了
4. 自动配置
boot所有的自动配置都是启动的时候扫描并加载, spring,factories所有的自动配置都在这里面,但是不一定生效,要判断条件是否成立,只要导入了对应的start,就有对应的启动器了,有了启动器,我们的自动装配就会生效,然后就会配置成功
springboot在启动的时候,从类路径下/META/spring.factorirs 获取指定的值;
将这些自动配置导入容器,自动配置就会生效,帮我进行自动配置
整合JavaEE,解决方案和自动配置的东西都在spring-boot-autoconfigure-2.2.0.RELEASE.jar这个包下.
它会把所有需要导入的组件,以类名的方式返回,这些组件就会被添加到容器
容器也会存在非常多的xxxAutoConfiguration 的文件, 就是这些类给容器中导入了这个场景需要的所有组件
二、一些简单的boot操作
1. yaml语句
一定要记住有空格!!! 空格很重要 代表了他们之间的层级关系
1) 基础语法
1
2
3
4
5
6
7
8
9
10
11
12
13
14
15
16
name: william student: name:william age:3 student {name:william ,age:3 }pets - cat - dog - pig pets: [cat ,dog ,pig ]
可以同时存在两个配置文件,但是他们有优先级
2) yaml可以直接个实体类赋值
常规方法
@Componet 标记为spring的组件 spring才会扫描
@Value (“”) 为属性添加值
@Autowired自动装配过来
yaml方法
配置了上图的configurationProperties()
1
2
@ConfigurationProperties(prefix = "person") ;
再加上对应的名 和yaml中的一样就可以赋值成功了
2. ConfigurationProperties
自定义配置文件
也可以自定义自己的配置文件绑定一下就行了
1
2
@PropertySouce(value = "classpath:qinjiang.properties")
也可以使用el表达式
1
2
3
4
5
6
7
8
9
10
11
12
13
person: name: qinjiang${random.uuid} age: ${random,int} happy: false birth: 2021 /10/13 maps: {k1: v1 ,k2: v2 }list: - code - music - girl dog: name: ${person.hello:hello}_旺财 age: 3
或者dog.name 那里 使用该表达式,如果person里(就上面那个类)有person.hello 就赋值person.hello 的值,否则就赋值"hello"
4. 松散绑定
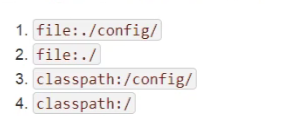
5. 配置文件相关
几个能配置appliction的位置
配置多个端口
1
2
3
4
5
6
7
8
9
10
11
12
13
14
15
16
17
server: port: 8080 spring: profiles: active: dev --- server: port: 8081 spring: profiles: dev --- server: port: 8082 spring: profiles: test
三、web开发
1. 导入静态资源
1 2 3 4 5 6 7 8 9 10 11 12 13 14 15 16 17 public void addResourceHandlers (ResourceHandlerRegistry registry) if (!this .resourceProperties.isAddMappings()) {"Default resource handling disabled" );else {this .addResourceHandler(registry, "/webjars/**" , "classpath:/META-INF/resources/webjars/" );this .addResourceHandler(registry, this .mvcProperties.getStaticPathPattern(), (registration) -> {this .resourceProperties.getStaticLocations());if (this .servletContext != null ) {new ServletContextResource(this .servletContext, "/" );new Resource[]{resource});
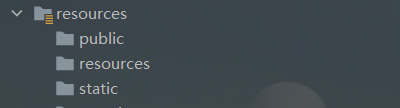
如果存在相同名字的文件, 他们之间存在一个优先级为
resources>static>public
2. 定制首页
把index文件放到静态资源的那三个目录里面,注意一定要是index这个名字
如果不放在那三个目录下,要放在template下则需要添加模板引擎,然后添加一个controller跳转
在pom.xml中导入这个依赖
1 2 3 4 5 <dependency > <groupId > org.springframework.boot</groupId > <artifactId > spring-boot-starter-thymeleaf</artifactId > </dependency >
这样以后template里的html文件通过controller 的跳转就可以访问了
简单的controller和thymeleaf使用
3. mvc配置原理
1 2 3 4 5 6 7 8 9 10 11 12 13 14 15 @Configuration public class MyMvcconfig implements WebMvcConfigurer @Override public void addViewControllers (ViewControllerRegistry registry) "/" ).setViewName("index" );"/index.html" ).setViewName("index" );"/main.html" ).setViewName("dashboard" );
4. 使用Lombok
Lombok注解快速注解一个标准类
1 2 3 4 5 <dependency > <groupId > org.projectlombok</groupId > <artifactId > lombok</artifactId > </dependency >
1
2
3
4
5
6
7
8
9
10
11
@Data @AllArgsConstructor @NoArgsConstructor public class Department public Integer id;public String departName;
5. thymeleaf使用
1 2 3 4 5 6 7 8 9 10 11 <html lang ="en" xmlns:th ="http://www.thymeleaf.org" > <link th:href ="@{/css/bootstrap.min.css}" rel ="stylesheet" > <link th:href ="@{/css/signin.css}" rel ="stylesheet" > <img class ="mb-4" th:src ="@{/img/bootstrap-solid.svg}" alt ="" width ="72" height ="72" >
注意导入命名空间和 @{ } 就是用来放链接的
本地的链接 都需要改+th:
给默认路径前面增加一个chen 的url
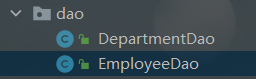
6. 数据层的实现
1 2 3 4 5 6 7 8 9 10 11 12 13 14 15 16 17 18 19 20 21 22 23 24 25 26 27 28 29 30 31 32 33 34 35 36 37 38 39 40 41 42 43 44 45 46 47 48 49 50 51 52 53 @Repository public class EmployeeDao private static Map<Integer, Employee> employees = null ;@Autowired private DepartmentDao DepartmentDao;static {new HashMap<Integer, Employee>();1001 ,new Employee( 1001 ,"AA" ,"2230035341@qq.com" ,0 ,new Department(101 ,"教学部" )));1002 ,new Employee( 1002 ,"BB" ,"6454564456@qq.com" ,1 ,new Department(102 ,"市场部" )));1003 ,new Employee( 1003 ,"CC" ,"2230044447@qq.com" ,0 ,new Department(103 ,"教研部" )));1004 ,new Employee( 1004 ,"DD" ,"2230454441@qq.com" ,1 ,new Department(104 ,"运营部" )));1005 ,new Employee( 1005 ,"EE" ,"8599855697@qq.com" ,0 ,new Department(105 ,"后勤部" )));private static Integer initId = 1006 ;public void save (Employee employee) if (employee.getId()==null ){public Collection<Employee> getAll () return employees.values();public Employee getEmployeeById (Integer id) return employees.get(id);public void delete (Integer id)
1 2 3 4 5 6 7 8 9 10 11 12 13 14 15 16 17 18 19 20 21 22 23 24 25 26 27 28 29 30 31 @Repository public class DepartmentDao private static Map<Integer, Department> departments = null ;static {new HashMap<Integer, Department>();101 ,new Department(101 ,"教学部" ));102 ,new Department(102 ,"市场部" ));103 ,new Department(103 ,"教研部" ));104 ,new Department(104 ,"运营部" ));105 ,new Department(105 ,"后勤部" ));public Collection<Department> getDepartment () return departments.values();public Department getDepartmentById (Integer id) return departments.get(id);
map集合.value()的返回值是Collection集合,并且一定 要在该类的上面写上 @Repository 注解,告诉spring这是一个dao的数据的层,封装一个bean,方便调用
7. 登录功能的实现
1 2 3 4 5 6 7 8 9 10 11 12 13 14 15 16 17 18 19 20 21 22 23 24 25 @Controller public class loginController @RequestMapping("/user/login") public String login (@RequestParam("username") String username, @RequestParam("password") String password, Model model, HttpSession session) if (!StringUtils.isEmpty(username)&&"123456" .equals(password)){"loginuser" ,username);return "redirect:/main.html" ;else {"msg" ,"用户名或密码错误" );return "index" ;@RequestMapping("/user/logout") public String logout (HttpSession session) return "redirect:index.html" ;
同样的道理,也需要在controller的类上加上@Controller注解,方法里面返回字符串,spring才会执行 字符串里的内容,如果是@Restcontroller的话,就只会把它当作普通的字符串返回给前端
@RequestParam简单的来讲就是把参数绑定在了url上
详情请见 https://blog.csdn.net/sswqzx/article/details/84195043?ops_request_misc=%257B%2522request%255Fid%2522%253A%2522163473054216780366541664%2522%252C%2522scm%2522%253A%252220140713.130102334..%2522%257D&request_id=163473054216780366541664&biz_id=0&utm_medium=distribute.pc_search_result.none-task-blog-2~all~top_positive~default-1-84195043.pc_search_es_clickV2&utm_term=%40RequestParam&spm=1018.2226.3001.4187
并且设置了一个session将用户的名字以 “loginuser” 的名字保存了下来
最后重定向到"main.html"这个url,因为前面 自定义了一个视图解析器,"main.html"这个url会跳转到dashboard这个html文件中。这样会比较安全
如果登录错误就将一个msg的数据通过model回传到前端
退出登录就是将session注销就行了 session.invalidate();
8. 拦截器的配置
这个时候可以登录了,发现一个问题,你直接输入mian的url照样可以进入登录的后的界面,这又问题啊,这里就需要用到我们的拦截器了。
1
2
3
4
5
6
7
8
9
10
11
12
13
14
15
public class LoginHanderInterceptor implements HandlerInterceptor @Override public boolean preHandle (HttpServletRequest request, HttpServletResponse response, Object handler) throws Exception "loginuser" );if (loginuser==null ){"msg" ,"没有权限,请您先登录!" );"/index.html" ).forward(request,response);return false ;else {return true ;
写拦截器首先需要实现一下HandlerInterceptor
然后重写preHandle
这里采用的是获取刚刚登录时发送的session 数据,要数据匹配才能登录
然后设置一个request的请求,设置一段话
通过转发的方法将这句话返回到登录的界面
request.getRequestDispatcher(“/index.html”).forward(request,response);//把这个请求专发到index页面
登录失败的时候就会显示这段话提醒
1 2 3 4 5 6 @Override public void addInterceptors (InterceptorRegistry registry) new LoginHanderInterceptor()).addPathPatterns("/**" )"/index.html" ,"/" ,"/user/login" ,"/css/*" ,"/js/**" ,"/img/**" );
最后一步就是将刚刚写好的拦截器配置一下,到刚刚继承了configurer的类里面重写一个addInterceptors的方法,配置他的拦截路径,new一个刚刚写好的拦截器,这里的addPathPatterns就是添加拦截路径,excludePathPatterns就是放行的路径。
9. 增删改查的实现
最重要的功能–增删改查
1
2
3
4
5
6
7
8
9
10
11
12
13
14
15
16
17
18
19
20
21
22
23
24
25
26
27
28
29
30
31
32
33
34
35
36
37
38
39
40
41
42
43
44
45
46
47
48
49
50
51
52
53
54
@Controller public class EmployeeController @Autowired @Autowired @RequestMapping("/emps") public String list (Model model) "emps" ,employees);return "list" ;@GetMapping("/add") public String add (Model model) "departments" ,departments);return "add" ;@PostMapping("/add") public String toadd (Employee employee) return "redirect:/emps" ;@GetMapping("/emp/{id}") public String update (@PathVariable("id") Integer id,Model model) "emp" ,employee);"departments" ,departments);return "update" ;@PostMapping("/updateEmp") public String toupdate (Employee employee) return "redirect:/emps" ;@GetMapping("/delete/{id}") public String delete (@PathVariable("id") Integer id,Model model) return "redirect:/emps" ;
这一部分主要是对数据库的操作,原理都差不多的.
四、springboot♂♀数据库
1. springboot整合JDBC
首先最重要的就是链接数据库
1
2
3
4
5
6
7
spring: datasource: username: root password: root url: jdbc:mysql://localhost:3306/mybatis?serverTimezone=UTC&useUnicode=true&characterEncoding=UTF-8 driver-class-name: com.mysql.cj.jdbc.Driver
这里使用的yaml配置,当然你使用properties也是差不多的
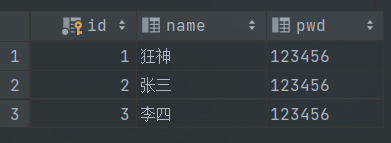
1
2
3
4
5
6
7
8
9
10
11
12
13
14
15
16
17
18
19
20
21
22
23
24
25
26
27
28
29
30
31
32
33
34
35
36
37
38
39
40
41
42
43
44
45
@RestController public class JDBCcontroller @Autowired @GetMapping("/select") public List<Map<String, Object>> userList(){"select *from user" ;return maps;@GetMapping("/adduser") public String adduserList () "insert into mybatis.user(id,name,pwd) values (4,'小明','123456')" ;return "add_ok" ;@GetMapping("/update/{id}") public String updateuserList (@PathVariable("id") int id) "update mybatis.user set name= ?,pwd = ? where id = " +id;new Object[2 ];0 ] = "小明" ;1 ] = "123445" ;return "update_ok" ;@GetMapping("/deleteuser/{id}") public String deleteuserList (@PathVariable("id") int id) "delete from mybatis.user where id = ?" ;return "update_ok" ;
这里唯一需要特别注意的就是第一个获取所有的数据的时候,jdbcTemplate.queryForList(sql)这里返回的是一个 List<Map<String, Object>>的数据类型
2. springboot集成Druid数据源
1
2
3
4
5
6
7
8
9
10
11
12
13
14
15
16
17
18
19
20
21
22
23
24
25
26
27
28
29
30
31
spring: datasource: username: root password: root url: jdbc:mysql://localhost:3306/mybatis?serverTimezone=UTC&useUnicode=true&characterEncoding=UTF-8 driver-class-name: com.mysql.cj.jdbc.Driver type: com.alibaba.druid.pool.DruidDataSource initialSize: 5 minIdle: 5 maxActive: 20 maxWait: 60000 timeBetweenEvictionRunsMillis: 60000 minEvictableIdleTimeMillis: 300000 validationQuery: SELECT 1 FROM DUAL testWhileIdle: true testOnBorrow: false testOnReturn: false poolPreparedStatements: true filters: stat,wall,log4j2 maxPoolPreparedStatementPerConnectionSize: 20 useGlobalDataSourceStat: true connectionProperties: druid.stat.mergeSql=true;druid.stat.slowSqlMillis=500
前面的数据源的配置和前面的jdbc都是一样的,就是多了后一大堆,多了记录日志的功能,要使用这个功能需要再在xml里面导入log4j的依赖;
1
2
3
4
5
6
7
8
9
10
11
12
13
14
15
16
17
18
19
20
21
22
23
24
25
26
27
28
29
30
31
32
33
34
35
36
37
38
39
40
41
42
43
44
45
46
47
48
49
50
@Configuration public class DruidConfig @ConfigurationProperties(prefix = "spring.datasource") @Bean public DataSource druidDatasource () return new DruidDataSource();@Bean public ServletRegistrationBean a () new ServletRegistrationBean<>(new StatViewServlet(), "/druid/*" );new HashMap<>();"loginUsername" , "admin" ); "loginPassword" , "123456" );"allow" , "" );return bean;@Bean public FilterRegistrationBean webStatFilter () new FilterRegistrationBean();new WebStatFilter());new HashMap<>(); "exclusions" ,"*.js ,*.css,/druid/*" );return bean;
配置好了以后,你在url中输入druid就可以进入一个登录界面
五、SpringSecurity
SpringSecurity是针对Spring项目的安全框架,也是Spring Boot底层安全模块默认的技术选型,它可以实现强大的Web安全控制,对于安全控制,我们仅需要引入spring-boot-security模块,进行少量的配置,即可实现强大的安全管理
记住几个类
WebSecurityConfigurerAdapter: 自定义Security策略
AuthenticationManagerBuilder:自定义认证策略
@EnableWebSecurity:开启WebSecurity模式
1. 设置页面的访问权限
1
2
3
4
5
6
7
8
9
10
11
12
13
14
15
16
17
18
19
@EnableWebSecurity public class SecurityConfig extends WebSecurityConfigurerAdapter @Override protected void configure (HttpSecurity http) throws Exception "/" ).permitAll() "/level1/**" ).hasRole("vip1" ) "/level2/**" ).hasRole("vip2" ) "/level3/**" ).hasRole("vip3" ); "/tologin" );
通过继承和重写authorizeHttpRequests方法用以实现页面的访问权限,有点类似于拦截器配置路径
2.设置认证授权
通过对用户的认证授权,赋予用户不同的访问权限
1 2 3 4 5 6 7 8 9 10 11 12 @Override protected void configure (AuthenticationManagerBuilder auth) throws Exception new BCryptPasswordEncoder())"kuangshen" ).password( new BCryptPasswordEncoder().encode("123456" ) ).roles("vip2" ,"vip3" )"root" ).password( new BCryptPasswordEncoder().encode("123456" ) ).roles("vip1" ,"vip2" ,"vip3" )"guest" ).password( new BCryptPasswordEncoder().encode("123456" ) ).roles("vip1" );
这里需要注意的是直接写密码是会报错的,因为spring会认为这不安全,需要加密一下,这里采用的是BCryptPasswordEncoder加密的方式,如果需要增加用户只需要加上and就行。
3.注销和记住我功能
emmmm,然后第三个功能注销和记住我功能的配置
1 2 3 4 5 6 7 8 9 10 11 12 13 14 15 16 17 18 19 20 @Override protected void configure (HttpSecurity http) throws Exception "/" ).permitAll()"/level1/**" ).hasRole("vip1" )"/level2/**" ).hasRole("vip2" )"/level3/**" ).hasRole("vip3" );"/tologin" );"/" );
感觉没有啥写的,主要就是在那个方法里面配置这两行代码就行
4.SpringSecurity集成thymeleaf
虽然一直觉得thymeleaf拉跨得一批,但是该学得还是要学
1 2 3 4 5 6 7 8 9 10 11 12 13 14 15 16 17 <html lang ="en" xmlns:th ="http://www.thymeleaf.org" xmlns:sec ="http://www.thymeleaf.org/thymeleaf-extras-springsecurity4" > <div class ="column" sec:authorize = "hasRole('vip1')" > <div class ="ui raised segment" > <div class ="ui" > <div class ="content" > <h5 class ="content" > Level 1</h5 > <hr > <div > <a th:href ="@{/level1/1}" > <i class ="bullhorn icon" > </i > Level-1-1</a > </div > <div > <a th:href ="@{/level1/2}" > <i class ="bullhorn icon" > </i > Level-1-2</a > </div > <div > <a th:href ="@{/level1/3}" > <i class ="bullhorn icon" > </i > Level-1-3</a > </div > </div > </div > </div > </div >
这里的 sec:authorize = “hasRole(‘vip1’)” 的意思就是只有登录的用户的权限是vip1的时候这短前端代码才会展示出来
六、一些常用的任务
1.异步任务
首先我们来看看普通的方法
使用多线程
1
2
3
4
5
6
7
8
9
10
11
12
13
14
15
16
17
18
19
20
21
22
23
24
25
26
27
@Serice public class AsyncService public void hello () try {3000 );catch (InterruptedException e){"系统正在处理。。。。。" );@RestController public class AsyncController @Autowired @RequestMapping("/hello") public String hello ()
使用springboot实现,只需要两步就可以实现
1
2
3
4
5
6
7
8
9
10
11
12
13
14
15
16
17
18
19
20
21
22
23
24
25
26
27
28
29
30
@Serice public class AsyncService @Async public void hello () try {3000 );catch (InterruptedException e){"系统正在处理。。。。。" );@EnableAsync @SpringBootApplication public class YibuApplication public static void main (String[] args)
大功告成,这样就可以实现异步任务了。
2.邮件任务
邮件任务也是经常需要写的任务。
导入依赖
1 2 3 4 5 <dependency > <groupId > org.springframework.boot</groupId > <artifactId > spring-boot-starter-mail</artifactId > </dependency >
获取你邮箱的POP3/SMTP的码
在配置文件里面配置相关信息
1
2
3
4
5
spring.mail.username=2108796780@qq.com spring.mail.password=刚刚的那个码 spring.mail.host=smtp.qq.com spring.mail.properties.mail.smtp.ssl.enable=true
这里需要注意:
好的,现在来一个简单的邮件
一个复杂的邮件
你也可以把这个发邮件的方法封装一下
3.定时任务
定时任务的实现也很简单,主要就是cron表达式有点难理解
首先需要开启定时功能,这个和之前的一样,只需要Enable就可以@EnableScheduling 注解,也是直接加到主类上面就可以了。
第二步就是编写一个方法,在方法的上面加上 @Scheduled() 就行,注解里面需要填写表达式,这个不需要记忆,需要的时候去查就行,附上一个链接在线的cron生成器 ,为了方便理解,附上一张图,如下图。
4.文件上传
最近在写一个项目的时候,需要用到文件的上传的任务,因此把代码粘在这里,以便后面继续回顾和使用
1
2
3
4
5
6
7
8
9
10
11
12
13
14
15
16
17
18
19
20
21
22
23
24
25
26
27
28
29
30
31
32
33
34
@RestController public class FileController @Autowired private DynamicService dynamicService;@PostMapping(value = "/fileload") public void fileUpload (@RequestPart("file") MultipartFile file, HttpServletRequest request ) "." ));"D:/文档/新鲜出炉的程序/SpringBoot/LostandFound/src/main/resources/static/img/dynamic/" ;new File(filePath + fileName);if (!dest.getParentFile().exists()) {try {catch (IOException e) {finally {" " +session.getAttribute("uid" )+(String)session.getAttribute("dtext" )+session.getAttribute("dtag" ));"img/dynamic/" +fileName, (Integer) session.getAttribute("uid" ),(String)session.getAttribute("dtext" ),(String)session.getAttribute("dtag" ));